How to Turn a Photo Into Pixel Art: SNES-Style Workflow
Turn photos into retro-looking scenes by simplifying shapes and tightening the palette early.
Turn a photo into pixel art with a practical SNES-style workflow that simplifies shapes, limits the palette, and keeps the final image readable.
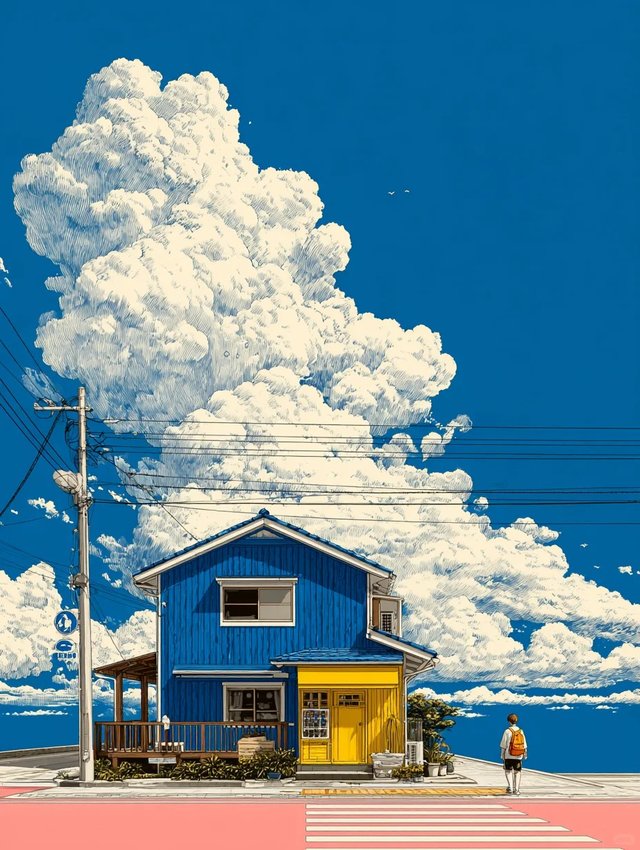
If you want a photo to feel like SNES-style pixel art, the goal is not to preserve every detail. The goal is to simplify the image until the big shapes read clearly, then use palette limits and light cleanup to create a stronger retro look.
If you want to follow along in the browser, start with the Image to Pixel Art Converter. For extra context, you can also read How to Pixelate an Image and How to Fix a Pixelated Image That Looks Blurry or Muddy.
Why this workflow works
- It keeps important silhouettes readable after downscaling.
- It uses palette limits to create a stronger retro feel.
- It saves cleanup for the end, so you do not over-edit too early.
Before you upload
- Pick a source image with clear lighting and strong shapes.
- Crop away background clutter before converting.
- Decide where the final art will live: avatar, sprite sheet, poster, or social post.
Step 1: Upload and choose a smaller target size
- Open the converter and upload the source image.
- Lower the pixel size until the big shapes are still readable.
- For an SNES-style feel, aim for a result that looks compact and readable rather than hyper-detailed.
Step 2: Limit the palette early
- Reduce the palette before making lots of slider adjustments.
- Start around 16 to 32 colors, then move up only if important details disappear.
- If the image feels muddy, try a different palette before touching brightness or saturation.
Step 3: Use contrast and dithering carefully
- Increase contrast a little to separate foreground shapes from the background.
- Add dithering only when a flat gradient needs texture.
- Avoid pushing both contrast and dithering too hard at the same time or the image can get noisy fast.
Step 4: Clean up the final result
- Check faces, outlines, and high-contrast edges at actual export size.
- If a background area is too busy, simplify it instead of adding more effects.
- Export a first pass, compare it with the source, then do one final round of small edits.
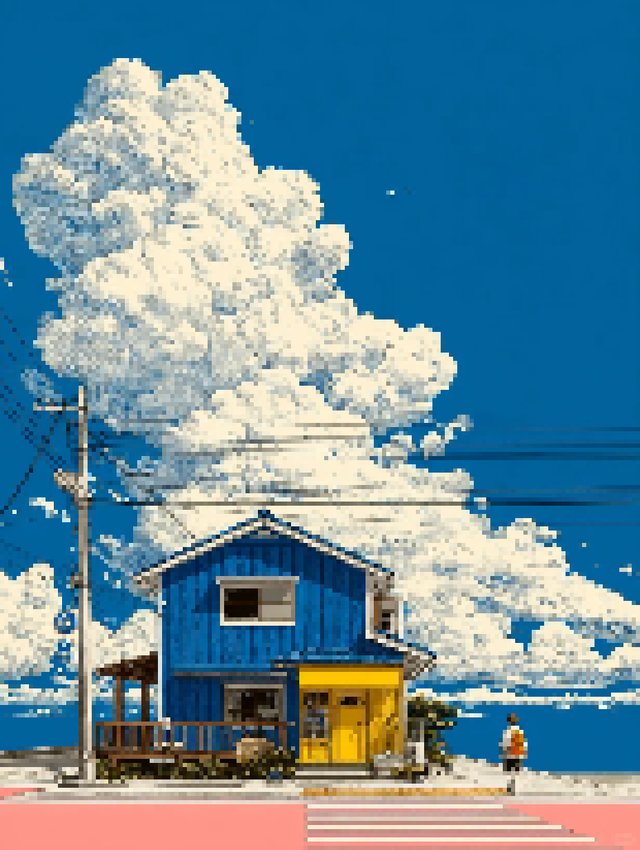
Example workflow: city photo to retro scene
Start with a city photo that has clear buildings and sky separation. Downscale it until the skyline still reads, cap the palette around 24 colors, then use mild contrast and a small amount of dithering on the sky. The goal is a cleaner scene, not a filter-heavy one.
Common mistakes
- Starting from a blurry source image and expecting clean edges later.
- Keeping too many colors, which makes the result look soft instead of intentional.
- Using heavy dithering to fix composition problems that should be solved with cropping or scale.
FAQ
How small should I go for an SNES-style look?
Start small enough that the main shapes still read clearly. For many photos, the best-looking result is the smallest size that keeps the subject recognizable.
Should I pick the palette or the pixel size first?
Set the rough size first, then limit the palette. That makes it easier to judge which details actually matter.
What if the result feels too sharp?
Back off the contrast, simplify the palette, or reduce the amount of dithering. Most of the time, a cleaner result comes from fewer strong adjustments, not more.
Try the full converter
When you are ready to test your own image, open the Image to Pixel Art Converter and work through the same steps on a real file.
Related Articles
How to Fix a Pixelated Image That Looks Blurry or Muddy
If your pixelated image looks blurry, muddy, or noisy, these cleanup steps help sharpen shapes, simplify color, and create a more intentional pixel art look.
How to Export Illustrator Artwork for Pixel Art
Export Illustrator artwork with cleaner edges before converting it to pixel art. Learn which PNG export choices help preserve sharp shapes and reduce blur.