How to Pixelate an Image Online: Beginner Step-by-Step Guide
Start with a clean first workflow: size first, palette second, cleanup third.
Learn how to pixelate an image online with a beginner-friendly workflow for choosing pixel size, reducing colors, and exporting a cleaner final result.
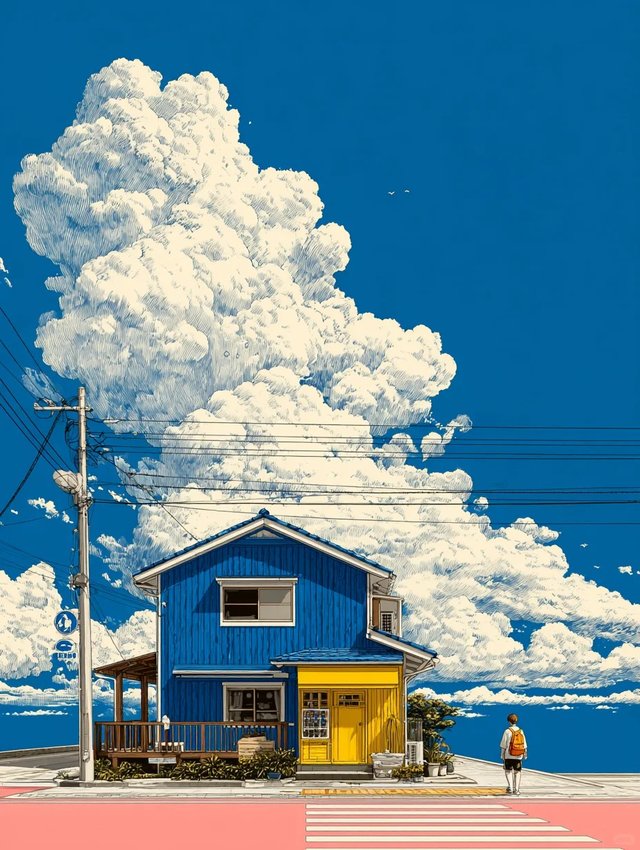
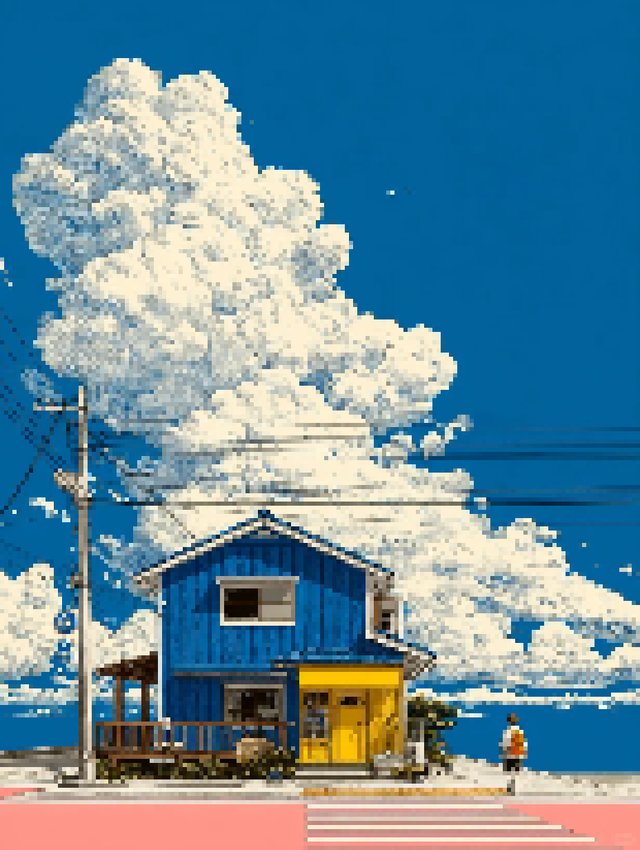
If you are learning how to pixelate an image online, start with the simplest goal: keep the main shapes readable, then reduce the colors until the result feels intentional instead of blurry. This step-by-step guide focuses on the core workflow beginners need first.
If you want to follow the steps with a real file, open the Image to Pixel Art Converter. Once you finish this guide, the next good read is How to Fix a Pixelated Image That Looks Blurry or Muddy.
Before you start
- Use a source image with clear lighting and readable shapes.
- Decide whether the final art is for an icon, sprite, poster, or social graphic.
- Expect to test a few sizes before the image feels right.
Step 1: Upload the source image
- Start with the clearest version of the image you have.
- Upload it into the converter and look at the overall silhouette before touching other controls.
- If the subject is hard to read at a glance, crop the source before continuing.
Step 2: Set the pixel size
- Increase the block size until the image takes on a clear grid structure.
- Stop when the subject is still recognizable at the final size you care about.
- Remember that bigger blocks are not always better if they erase the main shapes.
Step 3: Limit the palette and test dithering
- Reduce the palette to make the image feel more deliberate.
- Add dithering only when a flat area needs texture or smoother transitions.
- If the result becomes noisy, undo the last change and simplify instead.
Step 4: Export and review at real size
- Export a first version and view it where it will actually be used.
- Check whether outlines, faces, or key objects still read clearly.
- Do one small cleanup round after that real-size review.
Quick fixes for common problems
- Blurry output: Start from a clearer source or use a smaller final size.
- Too many muddy colors: Lower the palette before touching more sliders.
- Noisy texture: Reduce dithering and simplify the composition.
FAQ
How do I pixelate an image without installing software?
Use a browser-based converter so you can upload the file, preview changes, and download the result in one place.
What matters more: pixel size or palette?
Pixel size comes first because it decides whether the subject still reads. Palette changes work best after the shape is already right.
Can I make the image larger again after pixelating it?
Yes, but it works best when the pixel structure is already clean before you upscale the final export.
Try the workflow on your own file
Open the Image to Pixel Art Converter and run through the same four steps on a real image.
Related Articles
How Many Pixels Do You Need for a 4x6 Photo or Banner?
Use simple pixel targets for 4x6 photo prints, web banners, and large-format banners without guessing your export size.
What Does 96 Pixels Per Inch Really Mean for Print and Web?
Understand what 96 PPI actually controls, why it matters less for web images than many people think, and when it is too low for print.